After reading SRK forums for about a month, I am finally able to contribute. Paying for an arcade stick at the cost of +$100.00 is ridiculous. I wanted to bring an alternative to the Modded Mayflash, SE, and TE sticks. This post was inspired by http://forums.shoryuken.com/showthread.php?t=206013&highlight=honcam
Knowledge is power, so read up on your arcade stick stuff http://www.slagcoin.com
![IMG_4541.jpg]()
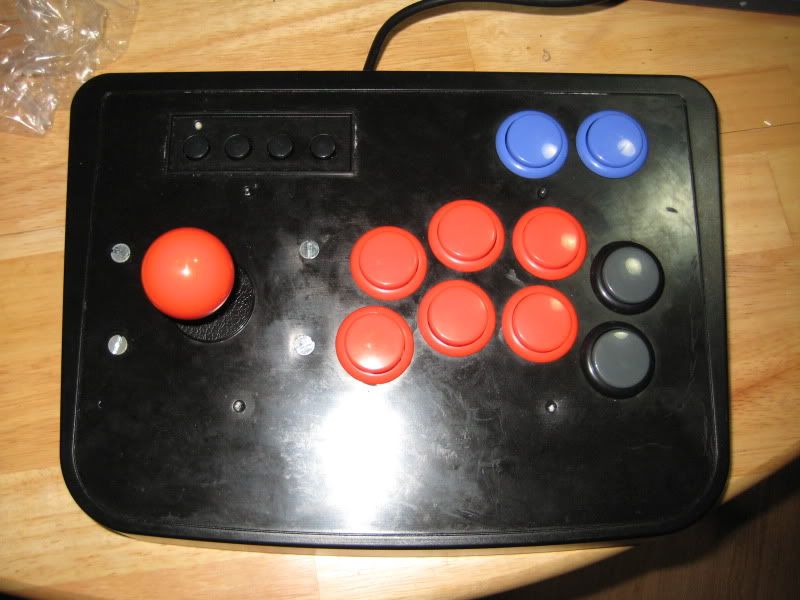
I purchased 2 Honcam Arcade Sticks for $49.99 on ebay. Two crappy sticks for the price of one.")
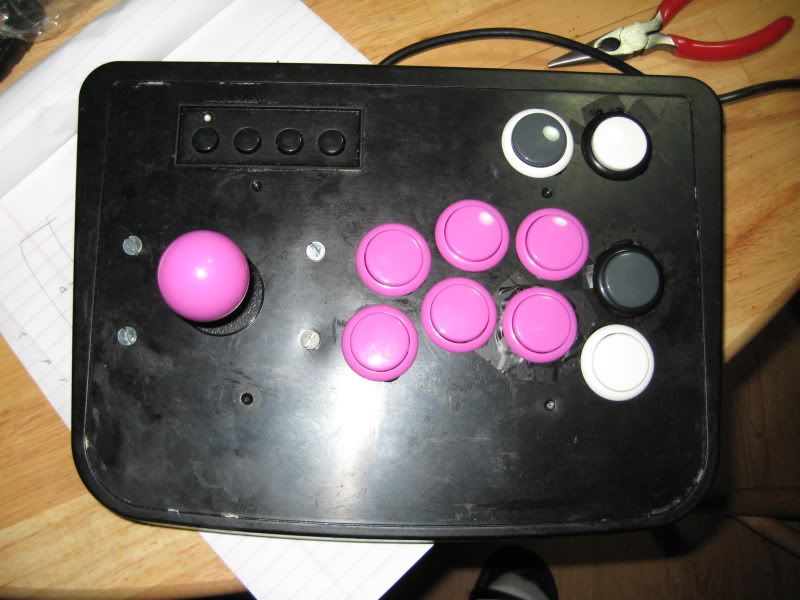
I am currently waiting for my order from LizardLicks. 2 JLF's and 20 Sanwa OSBF-30 buttons (various colors)
Out of the box, the stick was unable to perform diagnols. Fear not, here's a quick easy joystick mod to hold you over before the
replacement parts arrive. Besides, using a crappy stick to train on will help improve your Hadokens.
QUICK AND EASY MOD (MAY WORK ON MOST IF NOT ALL GENERIC CRAPPY STICKS)
Tools
1 Flathead Screw Driver
1 Phillips Screw Driver
4 inches of electrical tape
1. Remove the plastic film from the back panel of the plastic housing.
![IMG_4542.jpg]()
2. Use your Flathead Screw Driver/Fingernails to remove the rubber feet. The adhesive is really good, I just replaced the feet right next to the screw holes.
3. Unscrew the 6 Phillips screws with the Phillips Screw Driver and remove the metal back panel.
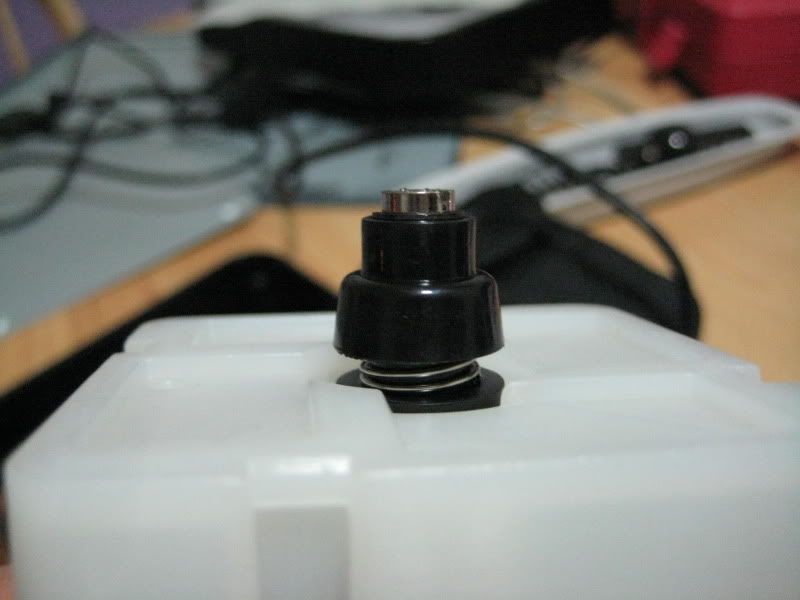
4. Use the flathead screw driver to hold the shaft in place while you unscrew the balltop.
![IMG_4543.jpg]()
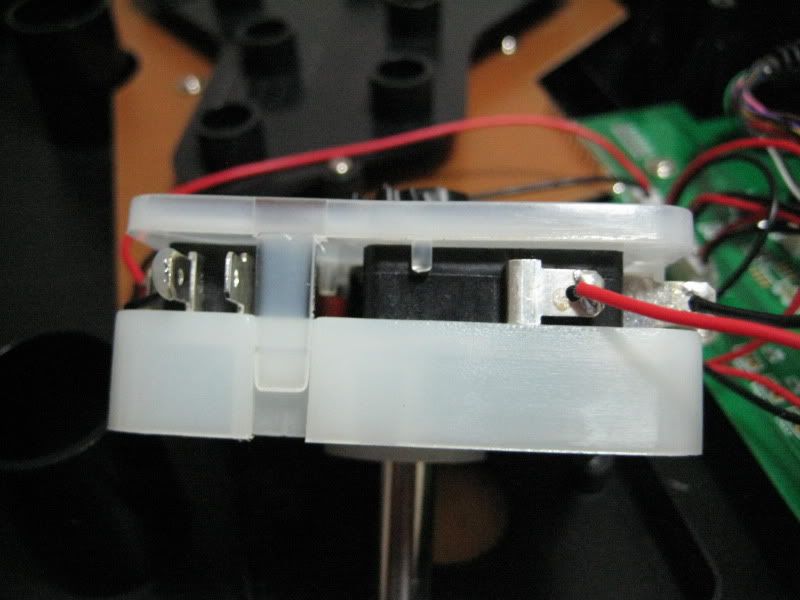
5. Unscrew the 4 screws from the joystick and remove the stick from housing. Be careful, although the microswitches soldering points have been hotglued, they can still come off.
6. Carefully unlatch the restrictor gate with the screw driver. It comes very easily so be gentle.
![IMG_4548.jpg]()
7. Carefully remove the microswitches (beware be gentle)
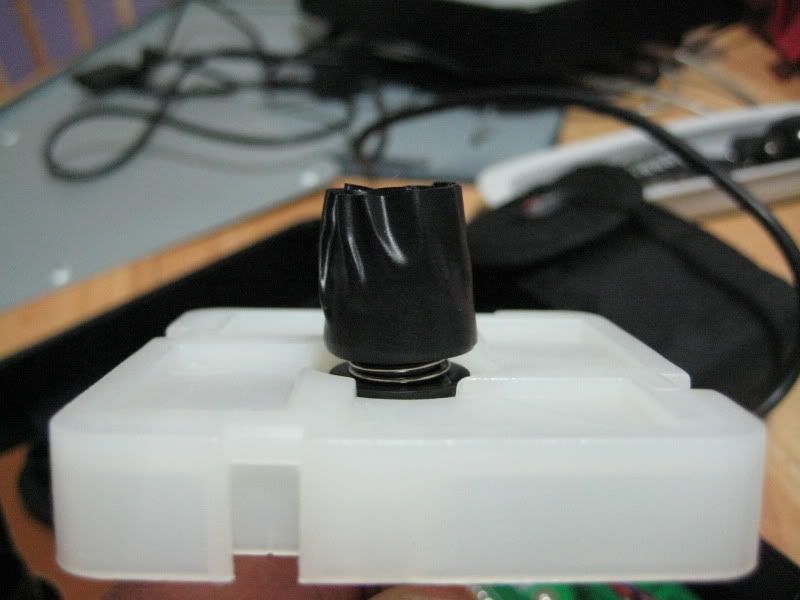
8. Wrap the electrical tape around the Actuator. (You can cut the access tape, but I left it as is since its going to be replaced anyway)
![IMG_4551.jpg]()
![IMG_4550.jpg]()
9. Replace the microswitches (in the correct order) and reattached the restrictor gate.
10. Rescrew all the appropriate screws in order to remount the stick and balltop. (don't forget the dust cover)
11. Replace the back metal panel and rescrew everything. DONE!
**The stick should now work, with a little effort. You can place more tape but I don't know if that will truly improve performance of
hitting the microswitches.**
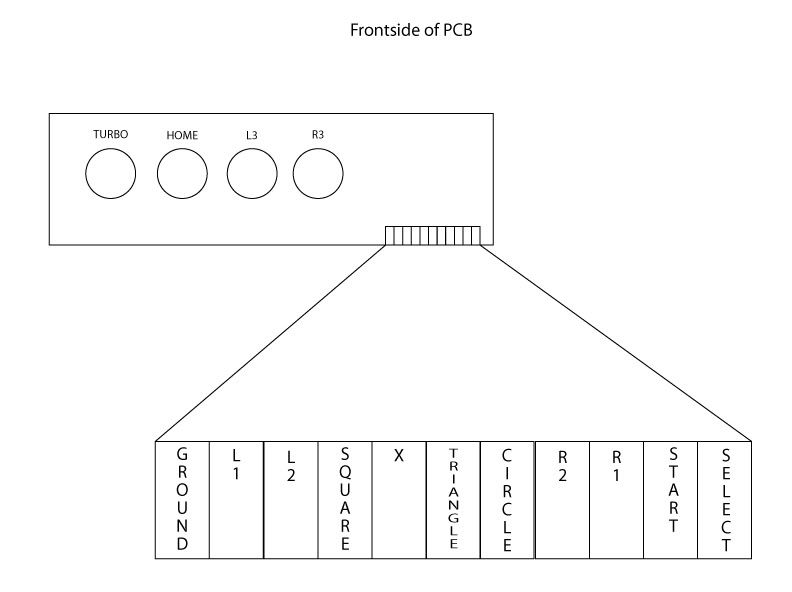
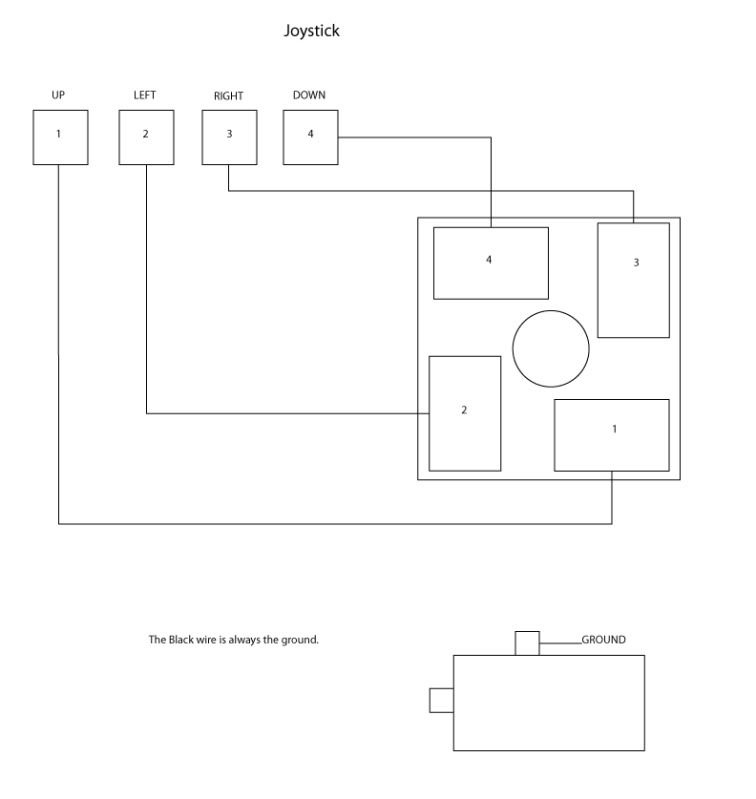
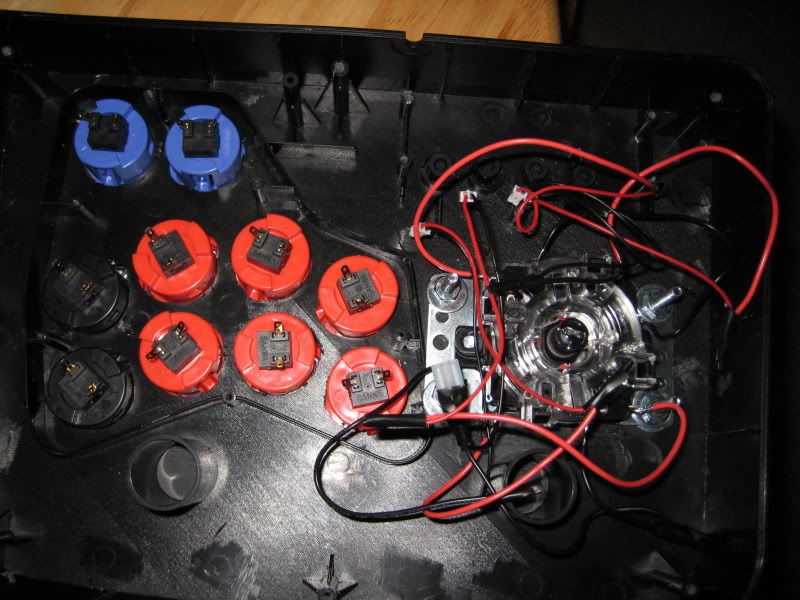
Here are some pics that you will find helpful for soldering and such. **FYI** The points on the backside of the pcb works as well. Which is where I soldered the buttons. When mounting the JLF, the wireless harness will not work because there is not common ground for the directions. All the buttons can be daisy chained but the directions cannot. I had to solder directly to the microswitches. Also, you can use the original microswitches instead of desoldering the jlf (you can use that for later use). I tried both and they both work exactly the same.")
![DremelPlastic.jpg]()
![FrontsideOfPCB.jpg]()
![BacksideOfPCB.jpg]()
![Joystick.jpg]()
I mounted the JLF horizontally. Which is why you have to dremel off the plastic where the stick was originally mounted and some areas around it.
![IMG_4563.jpg]()
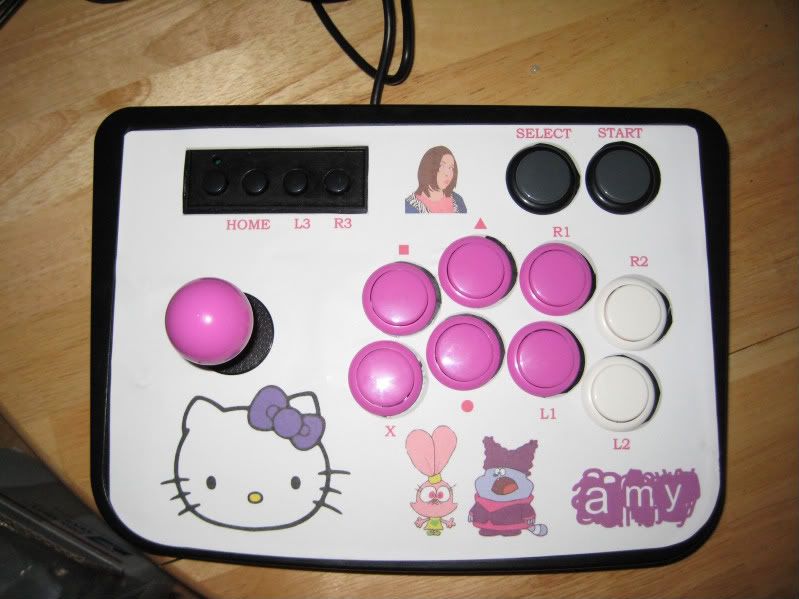
Here is the final product. I'm working on the template **Stay tuned**") I hope that was helpful.
I hope that was helpful.
![IMG_4558.jpg]()
![IMG_4565.jpg]()
![IMG_4567.jpg]()
![IMG_4568.jpg]()
![IMG_4566.jpg]()
Knowledge is power, so read up on your arcade stick stuff http://www.slagcoin.com

I purchased 2 Honcam Arcade Sticks for $49.99 on ebay. Two crappy sticks for the price of one.
")
I am currently waiting for my order from LizardLicks. 2 JLF's and 20 Sanwa OSBF-30 buttons (various colors)
Out of the box, the stick was unable to perform diagnols. Fear not, here's a quick easy joystick mod to hold you over before the
replacement parts arrive. Besides, using a crappy stick to train on will help improve your Hadokens.

QUICK AND EASY MOD (MAY WORK ON MOST IF NOT ALL GENERIC CRAPPY STICKS)
Tools
1 Flathead Screw Driver
1 Phillips Screw Driver
4 inches of electrical tape
1. Remove the plastic film from the back panel of the plastic housing.
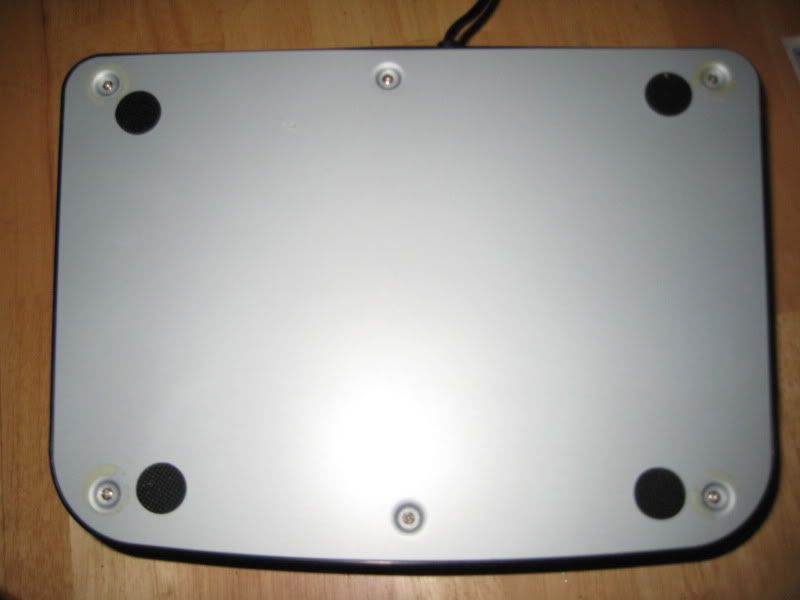
2. Use your Flathead Screw Driver/Fingernails to remove the rubber feet. The adhesive is really good, I just replaced the feet right next to the screw holes.
3. Unscrew the 6 Phillips screws with the Phillips Screw Driver and remove the metal back panel.
4. Use the flathead screw driver to hold the shaft in place while you unscrew the balltop.

5. Unscrew the 4 screws from the joystick and remove the stick from housing. Be careful, although the microswitches soldering points have been hotglued, they can still come off.
6. Carefully unlatch the restrictor gate with the screw driver. It comes very easily so be gentle.
7. Carefully remove the microswitches (beware be gentle)
8. Wrap the electrical tape around the Actuator. (You can cut the access tape, but I left it as is since its going to be replaced anyway)
9. Replace the microswitches (in the correct order) and reattached the restrictor gate.
10. Rescrew all the appropriate screws in order to remount the stick and balltop. (don't forget the dust cover)
11. Replace the back metal panel and rescrew everything. DONE!
**The stick should now work, with a little effort. You can place more tape but I don't know if that will truly improve performance of
hitting the microswitches.**
Here are some pics that you will find helpful for soldering and such. **FYI** The points on the backside of the pcb works as well. Which is where I soldered the buttons. When mounting the JLF, the wireless harness will not work because there is not common ground for the directions. All the buttons can be daisy chained but the directions cannot. I had to solder directly to the microswitches. Also, you can use the original microswitches instead of desoldering the jlf (you can use that for later use). I tried both and they both work exactly the same.


I mounted the JLF horizontally. Which is why you have to dremel off the plastic where the stick was originally mounted and some areas around it.
Here is the final product. I'm working on the template **Stay tuned**
I hope that was helpful.