Quantcast
Channel: Tech Talk — shoryuken
Viewing all 2075 articles
Browse latest View live

So I finally updated my SF Anniversary Stick to a modern PCB... a few questions

0
0
Questions below.

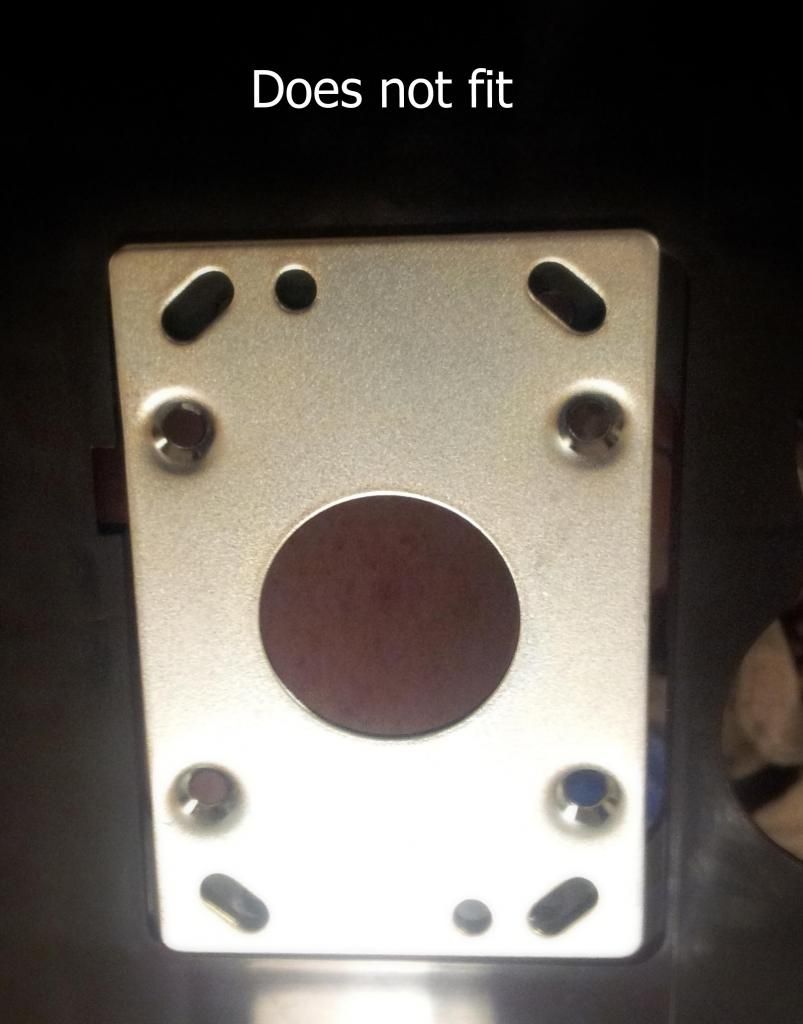
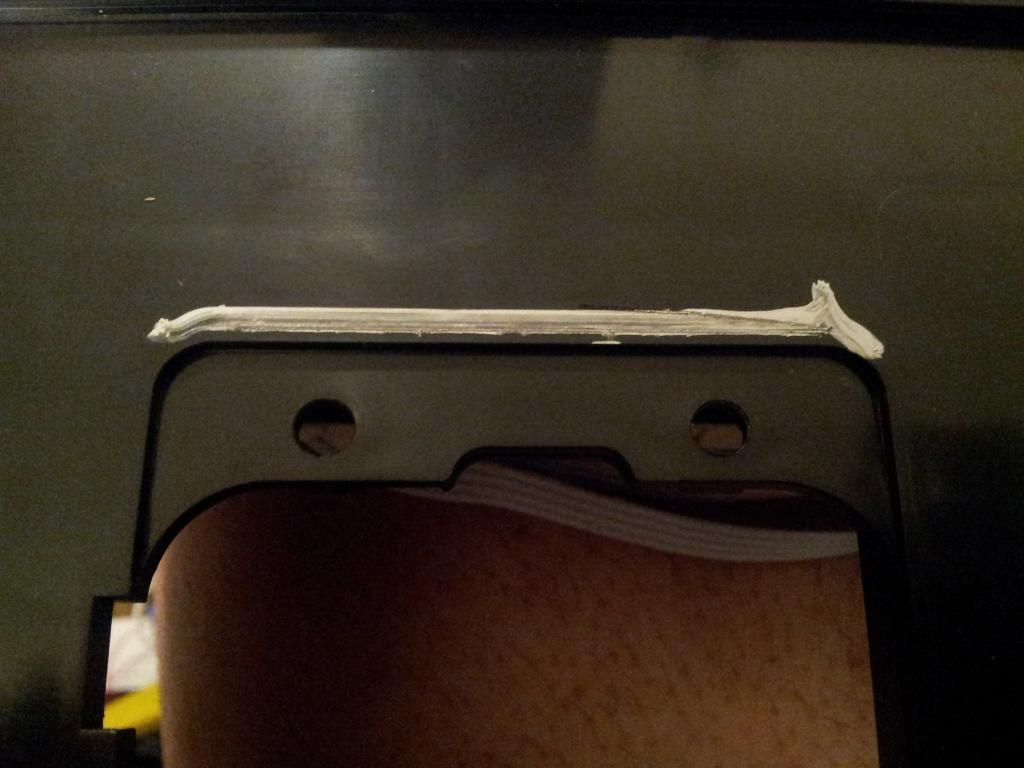
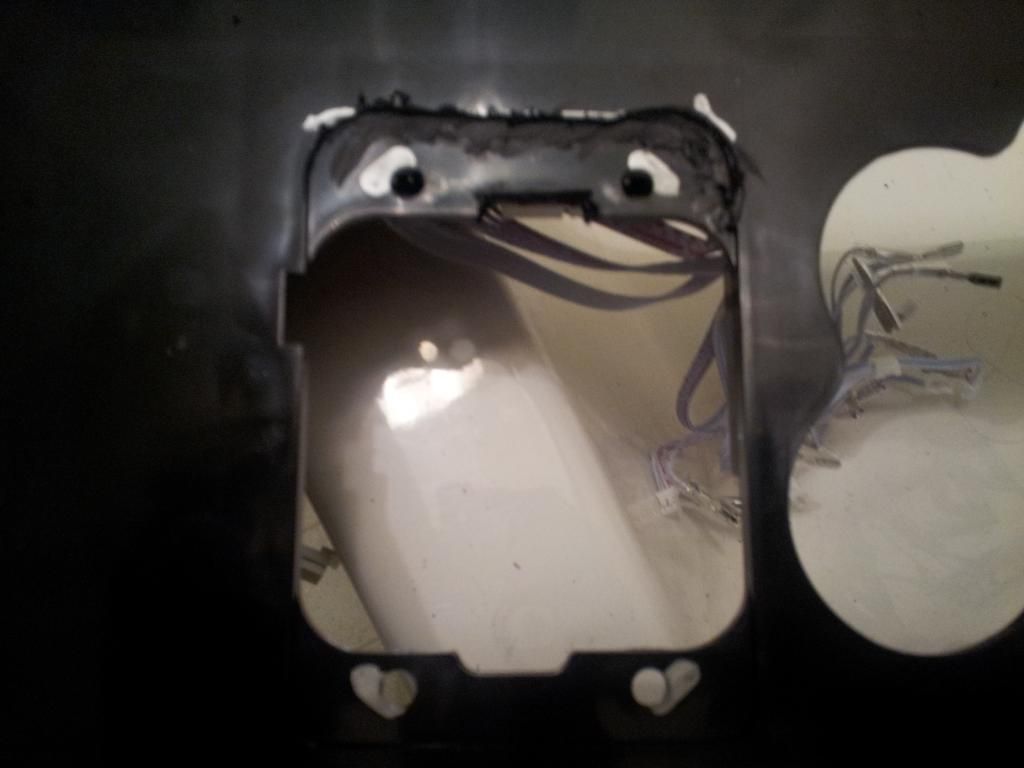
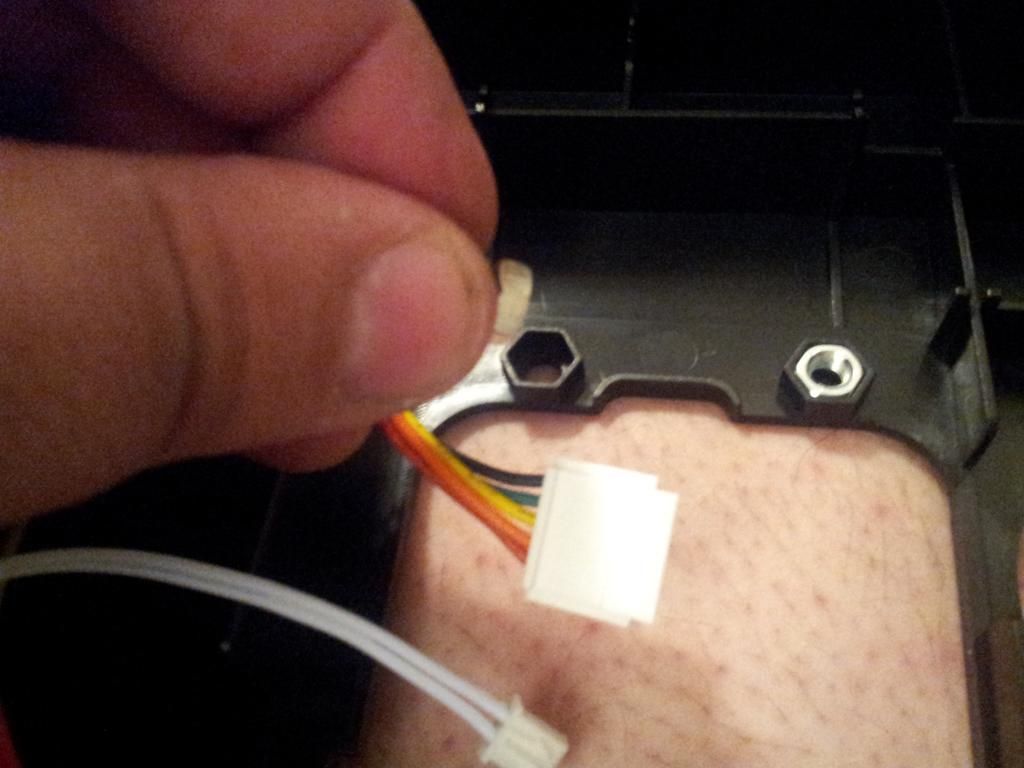
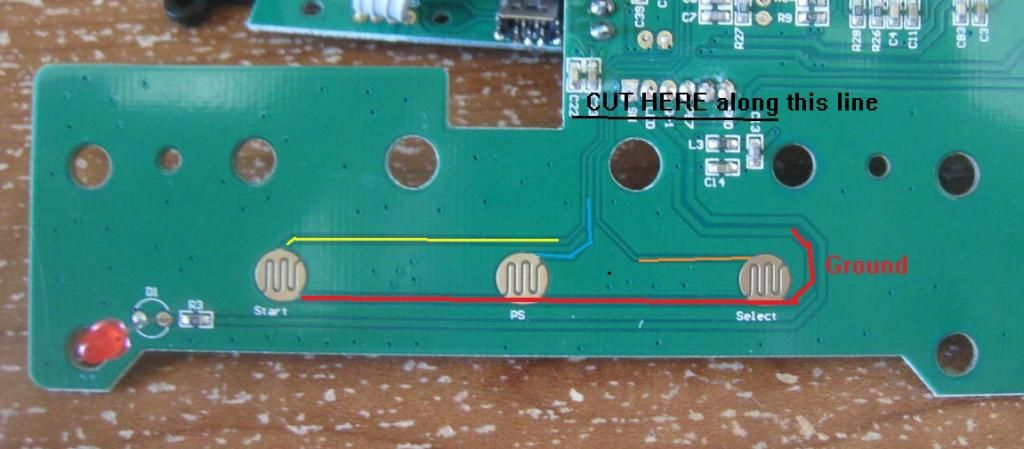
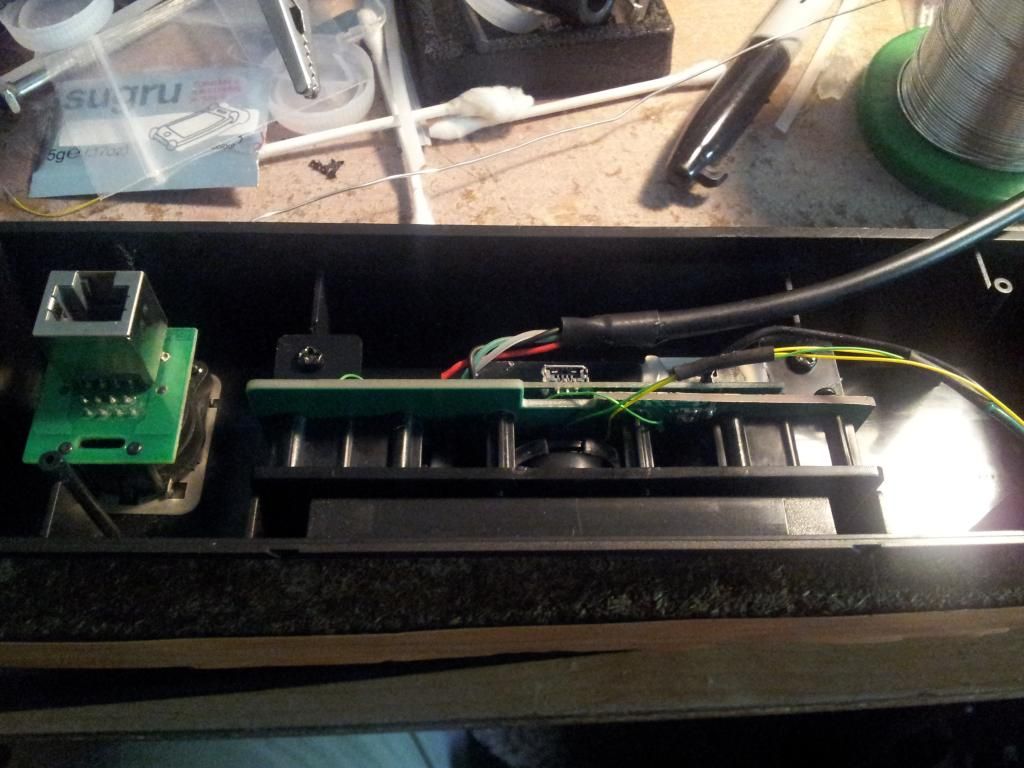
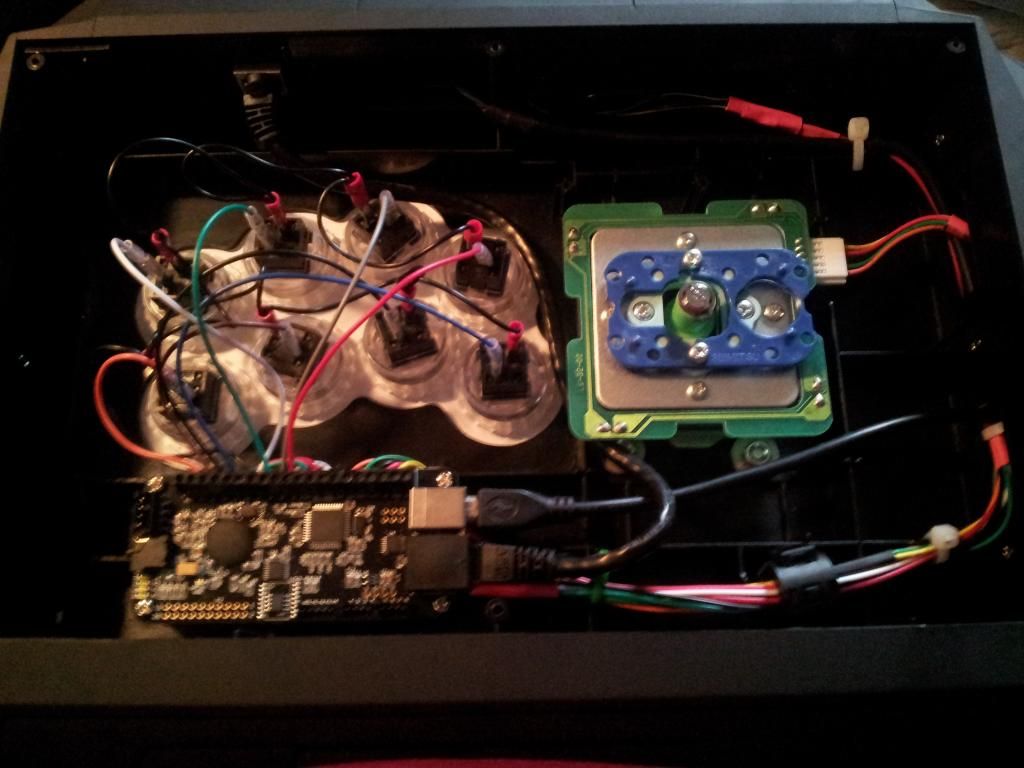
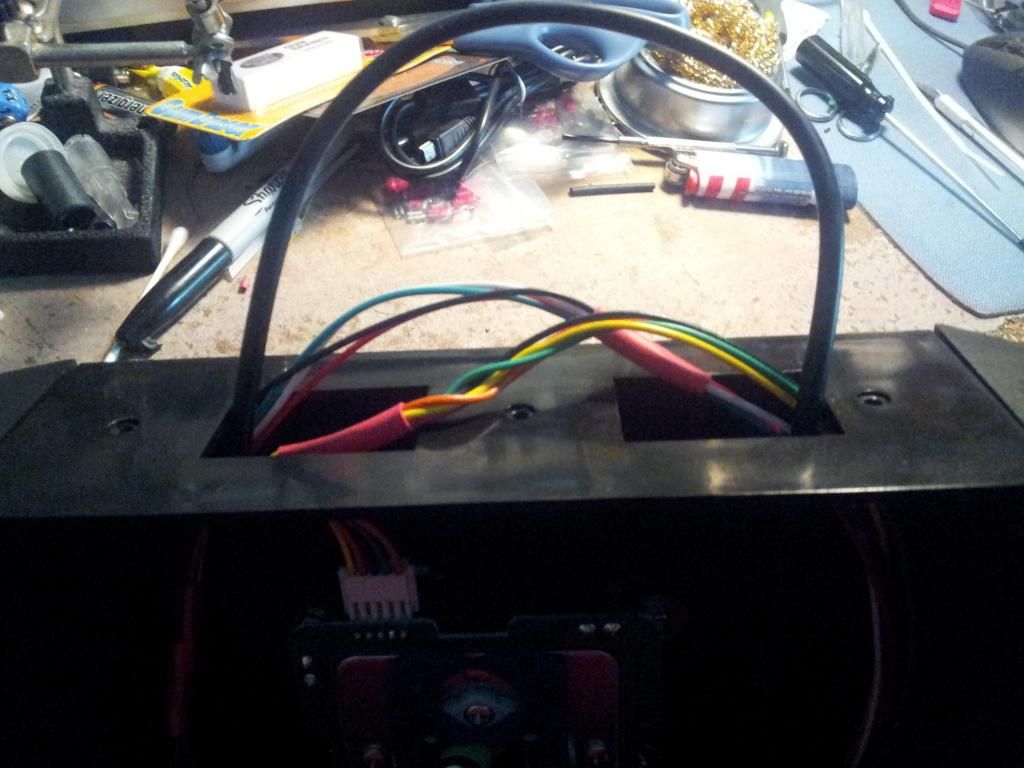
My SF Anniversary Stick has been collecting dust for about a decade. I ran across a few posts about updating the PCB and so I spent about 20 hours figuring out how to solder and roughing up my first xbox 360 PCB ( a Pelican TSX 360). The common grounds gave me a lot of trouble and about half way through the start button stopped functioning, so I ended up trying an Afterglow controller. It was CRAZY hard to open, I basically had to dremel through all the screws, but after getting the PCB out and (luckily it was still functioning) I discovered it had a universal ground so the switch was way easier than what I was dealing with the on the Pelican. So after solving a few minor clearance issues (the bottom lid was pressing on my analog inputs) it works fantastic! I'm very happy with the upgrade. I've had an X-arcade for a long time and have been running into the issue that a lot of modern games don't support keyboard input, and didn't feel like paying them more then I already have for a 360 adapter (yes, I've made a lot of poor stick choices...) and anyways its very nice to have the SF stick up and running again, so now I have two sticks.

Anyway, I'm not much of a fighting game guy, though we play a few. I tend to use my sticks for more traditional arcade gameplay, platformers and bullet hell shooters and the like (Symphony of the Night, Ikaruga, Megaman, etc.)

Lately, I've been playing Axiom.Verge, and one of the caveats of that game on PC is that it wants to map weapon selection to the right analog. That got me thinking about a few mods I'd like to put on this bad-boy and I was hoping to get the expertise of the community here in view of my use case.

1. Is there any true-analog solution for arcade sticks? I can deal with buttons if I need to but I can see advantages to a true analog. But I don't just want to map like a 360 analog and jam it in, I'd like something arcade-y if it exists, then I can figure out how to link that to the 360 PCB.

2. Where to mount the extra buttons/stick? Anyone ever tried mounting on the left side of the box? Or is it weird and just find somewhere on top?

3. Plenty of games insist on a left-analog sticks instead of a d-pad. I think I'd like to install a selector switch? So I can switch between L-analog and dpad as needed. Is this a more or less trivial install? Any tips here?

4. One of my buttons on the anniversary stick is sticking. Is that repairable or do I need to just replace it? Where should I go to do it the cheapest? (Like I said, not a huge fighting game guy so I don't need perfect buttons)

Thanks in advance. And thanks to slagcoin.com for some helpful PCB diagrams.!

Seimitsu Astro Panel - JLF mountable?

0
0
I'm currently bidding on Yahoo auctions for a 2 player panel and I would like to use JLFs and Sanwa push buttons on it. It's going to be an alternate panel for my stock HSS-0130 Astro (which will remain seimitsu).

Also for anyone familiar with the HSS-0130 and modding it, based on photos on the net it definitely can use Sega arcade panels but is there anything else I should know?

Btw I live in Japan so we don't need the discussion on using Yahoo auctions.

SF5 Vsync lag question

0
0
I'll get lag from vsync, but if I hit alt+tab for the steam overlay to pop up and then close it, the lag goes away.

I turned off vsync and had no problems, but I would like to wonder why is opening steam overlay fixing it and if there's a way to fix this problem I would like vsync on(no screen tearing)

I know it's not laggy, because of my computer specs, cause I can fix it by shift+shift(steam overlay) then closing it and bam, game goes to 60 fps.

I just hate having to do that like 80% of the time I play, so I turned it off until I find a solution.

Can anyone explain why shit+tabbing fixes my problem? Is there another way to fix so I don't have to do this?

DEMUL: dc version of Cacpom vs snk 2 unplayable on netplay

0
0
is the dc version of Capcom vs snk 2 unplayable on netplay (kaillera P2P) on demul builds beyond 0.5.6? i've tried it on demul 0.5.8.2 , 07a_221215 & 07a_160818 but whenever me and my friends connect on kaillera p2p the game screen just remains black and won't go any further...it works on 0.5.6 but even offline it lags and stutters a lot on that version...

pad hacked joystick issues with kof 14

0
0
before i explain the problem let me say i have been playing kof since 94 and every other fighting game that has been around on stick. i able to do special and combos with no problem for a long time

now my issue is that i have 2 pad hacked sticks and they work perfectly on sf5 and sf 4. but for some reason when i play kof 14 (which i have been playing for 4 days) its seems that sometimes the simplest movement such as a fire ball or leona's air special just doesnt come out more often then it does. does anyone else have a padhacked stick with the same problem? i play SF% and have no issues at all and i have other sticks made the same way (i make them) and never had an issue with 360/xboxone/ or ps4 for sf5/sf4.

this is something i cant understand, just seeing if anyone else has the same issue.

thanks

Mayflash v2/Ultra Ulia Modding Question, Seimitsu LS-32

0
0
Hi guys. Right now I'm thinking about buying a mayflash version 2 fighting stick and modding a seimitsu ls-32 to it.
What I've learned so far is that I'll probably need another mounting plate.
Is there something that fits nicely in the v2 and lets me use the ls-32 with it?

Are restrictor plates legal?

0
0
Are these used in tournaments??

Sorry if it's in the wrong place. Just found this place.

brook usb convertor 360/ps4 firmware update not working

0
0
i am having trouble with my convertor not updating right. i did what the pbf.file but it seem it doesn't wanna hook up to my pc. i try all my ports on my pc but nothing. but when i plug it in, it display blue/red light.

so if anybody know how to fix this problem please let me know asap.
here the firmware file number i was trying to update-20160408

Shorten Hori Hayabusa Throw?

0
0
Hey guys! I was wondering if anyone knows a solution to shorten the overall throw of a Hayabusa stick to match one like a Sanwa JLF? I like the tension just fine.

Maybe just switch back to a JLF? Not quite sure what to do.

Any insight would be much appreciated!

Qanba Carbon and Drone Arcade Stick, Guardian Bag Thread

0
0
Eightarc has recently released two new, budget, arcade sticks into the market: The Qanba Carbon and the Qanba Drone for $69.99 and $89.99 respectively. The Qanba Drone is the first officially licensed arcade stick by Sony for PS3 and PS4, along with PC support (Dinput or Xinput is unknown ATM). The Qanba Carbon looks like a reskinned Qanba Q1 exclusively for PC and Android via Xinput and Dinput.

NOTE: THESE STICKS ARE NOT GOING TO HAVE XBOX 360 OR XBOX ONE SUPPORT, just to clear that up. I know it should be common sense, but not everyone has common sense.

Qanba Drone (PS3/PS4/PC) Information:
The Qanba Drone has the dimensions of 14 x 6 x 9.5 inches with the joystick, weighing 3lbs total. The Drone is officially licensed by Sony for both PS3 and PS4, this means there won't be an 8 minute timeout. The stick also comes with Qanba OEM parts, but it is expected that the arcade stick will accept Sanwa and Seimitsu parts, along with Hori as well knowing Qanba's track record on this. The stick uses a Vewlix styled layout, it also has L3, R3, Home, Options, Share, Tournament Lock, and Turbo above all the buttons. This stick will not have the touchpad unlike the HRAP4 or TES+/TE2+.

Pros:
-No 8 minute timeout
-230cm/7.7ft USB cable according to their Facebook page
-Anti-slip bottom pad
-Tournament Lock Switch
-L3 and R3 buttons are pretty cool, especially since this is the only budget stick with them.

Neutral:
-Vewlix Layout (why can't we have more Noir options for retail sticks?)
-It is pretty small, but it's larger than the MadCatz Fight Stick Alpha and Hori Fighting Stick Mini
-3 pounds (I'd throw a few rolls of pennies and tape them in or something tbh to make it heavier)

Cons:
-No metal bottom panel?
-No actual USB compartment storage?
-Qanba OEM buttons, but this was to be expected

Unconfirmed:
-Common Ground PCB?
-Plexi option in the future? Hope there is, since that art isn't really my style tbh.
-Xinput support?
-Can it be easily swapped with Sanwa and Seimitsu buttons?
-Buttons and Joystick uses QDs and Joystick 5-pin harness?
-Table clamp attachment from Qanba Carbon/Q1 compatible?

Qanba Carbon (PC and Android) Information:
WIP section, but mostly, AFAIK, a reskinned Qanba Q1.

Pros:
-Easily drops in Sanwa and Seimitsu parts
-Metal top panel iirc
-Removable Table Clamps
-USB compartment
-Anti slip bottom
-Tournament Lock Switch

Neutral:
-Vewlix Layout
-WIP

Cons:
-Qanba OEM parts by default, but again to be expected
-No metal bottom panel iirc

Well I'll update this thread when more info is released from people who opens up the stick and observes everything. For now this is all the info we got I think, so it's not complete and I'll update it as time passes by and when people drops new info here. If you have any questions regarding the sticks, then ask here. Any other questions then go to the sticky here. Criticism towards how I made my thread, please PM me here on SRK and I'll gladly take constructive criticism.

The links to the two stick's store page: Drone and Carbon

The Guardian Bag (info copied from Eightarc's website for now, hopefully I can expand this section with real info later):
-Fits most modern joystick models up to 19 inches long
-Hemp-style durable fabric
-Dual snap-buckles for easy access
-Triple auxiliary zipper pockets
-Dual water bottle stretch pockets
-25 x 15 x 8 inches
-Extra pockets
-Double zippers
-MSRP is $89.99
Link to the bag on Eightarc's website

Are Sanwa OSBN-30 Translucent Yellow Screwbuttons an actual thing?

0
0
I feel like I am losing my mind here. I usually use Seimitsu screwbuttons, but my current project ran into a bit of a stuck point - Seimitsu's translucent yellow buttons don't match their own bubble top!

QotV2GS.jpg

Realizing that I could just use the Sanwa which matches multiple ball-top options, I went on to look for it. I can find the snap-ins just fine:

https://www.focusattack.com/sanwa-obsc-30mm-translucent-pushbutton-yellow/

Every google search I can think of either turns up empty, turns up the Seimitsu, or turns up the snap-in.

I have a feeling I'm not going to like the answer here, but does anyone know for certain?

In Desperate Need For Fightstick

0
0
Im a teenager with no money, definitely not enough to buy a new ps4 TE 2 Fightstick. I thought about building one because I have an old injustice Fight Stick case laying around but I have no Idea where to start. Please help.

Dovetail joins for fight sticks

0
0
This makes it look so easy. Figured others my like it.

image

Light-up on activation button mod tutorial

0
0
**Added new pictures from speedsterharry, including one that explains how to install a switchless version of the mod

First of all, big thanks to Toodles. He helped explain everything to me. I just fabricated it. You're my hero Toodles :tup:

This tutorial explains how to make your (hopefully) translucent buttons light up when activated.

You will need...
1) Soldering iron
2) 6 LEDs (I used white LEDs that were rated at 3.3v)
3) 6 resistors (1/8 watt, 220 - 2.5k Ohms. Depends on how bright you want the LEDs to be)
4) A hex inverter (Toodles recommended the 74HCT04, but also said that any of the 7404 family will work like the 74LS04 or 74HC04)
5) A battery holder (3-4 AA/C/D batteries. Your choice)
6) A SPST switch (Toggle/pushbutton/rocker. Again, your choice)
7) An extra, unused ground coming from your PCB
8) (optional) A barrier strip to help with the ground wiring (You'll be soldering 8 wires to 1 tiny pin. Think about it :smile:)

**YOUR PCB MUST BE COMMON GROUND FOR THIS MOD TO WORK**

The hex inverter will be the center of the mod. There are 14 pins on the hex inverter.

1) Input 1
2) Output 1
3) Input 2
4) Output 2
5) Input 3
6) Output 3
7) Ground
8) Output 4
9) Input 4
10) Output 5
11) Input 5
12) Output 6
13) Input 6
14) Vcc (Power)

Basically, the positive end of the power source is wired to the switch, then to Pin 1 (Vcc) of the hex inverter. The negative end of the power source is wired to Pin 14 (ground). Now attach 1 resistor to the positive end of all of your LEDs (the longer leg), then place the LEDs in your buttons (under or taped to the sides of the button works fine as well). I used Seimitsu PS-14-K buttons, so I popped off the plungers of the buttons and bent the LEDs so the legs would stick out of the small, narrow hole where the buttons snap into metal panels. Now with the LEDs prepped, wire the other end of the resistors to the outputs of the hex inverter (Pins 2, 4, 6, 8, 10, 12) and the negative ends of the LEDs to Pin 14 (ground). Also, take the extra ground from your PCB and wire it to Pin 14 (ground) as well.

You'll now need to hook-up the signal wire of your buttons to the inputs of the hex inverter (Pins 1, 3, 5, 9, 11, 13). I did this by soldering to the back of my quick disconnects.. Make sure you hook-up the signal wires of the buttons to the corresponding LED output, or you'll end up pressing LP and having HK light up.

If all of the above is too confusing or you're just too lazy to read, here's a diagram I made when I was doing this mod to my HRAP2.

2901223980084014115S600x600Q85.jpg
*The green wire is the non-ground wire for the button*

If the previous picture is too hard to understand, here's a clearer one made by speedsterharry.
TingBoy_LightUp.png

This only shows the wiring for 1 button, so just rinse and repeat for the rest.

When you're done, it should work like [media=youtube]KgF1KIIpjDU"[/media].
I hope this tutorial helped! I'll add some pictures of the guts of my stick when I decide to open up my HRAP2 again.

After hearing about Toodles' idea for a switchless version of the mod, I decided to try it out. I was going to make another picture/schematic, but speedsterharry beat me to it, so here you guys go.

TingBoy_LightUp2.png

The mod is relatively the same. Just compare the schematics and you'll find the differences. Here's Toodles' post on this

If you want to light up the joystick, you'll need a drilled shaft, a 4 input NAND logic chip (74HCT20), and some neat wiring =)
Refer to Kaytrim's post

Feel free to ask questions/criticize/comment :smile:

Return of Justice. Darksakul's Injustice Mod worklog.

0
0
First up Read the other Injustice thread, I will wait.
http://forums.shoryuken.com/discussion/174669/injustice-gods-among-us-battle-edition-arcade-stick

Okay its time to Mod the Injustice Stick, as the Real Injustice is not because
Super Man is a Dick
But that PDP decided to use Qanba made parts.

First what I did was attempt to fit a Seimitsu LS-32-1 (because Sanwa is poop and the stock Qanba parts are worst).

af017dbc-ec87-4381-b7cf-20be149f0433_zps6172d7e0.jpg
Unlike the Sanwa JLF mount plate, the Seimitsu mount plate doesn't fit in the gap provided. Protip: for you Sanwa lovers, you can swap the JLF's mount place for the stock mount place and your JLF mounts fine.

20130422_212817_zps6eb2f22e.jpg
I marked off where to dremel
20130422_213426_zps4de8ab38.jpg
And made my Cuts. Like the JLF mount plate the LS-32 plate mount holes does not like up with the Injustice stick.

20130422_212415_zps9454178e.jpg
First remove the nuts that are going to hold the mount plate in place,

Then use a dremel or a drill to widen up those screw holes, and continue with cutting away those brackets that held the nut in place.

20130422_215216_zps0548bd8a.jpg
23eba191-a0db-4d85-8142-8fd5cd07dd5c_zps73605cdd.jpg
As you can [NOT] see I added some metal washers to reinforce those holes.

If you are stoping the Mod here, you want to mod the bottom lid as well so you can close your stick
20130422_224630_zps45523bc1.jpg

Next is hacking up that PCB.

Remove the side panels, so you can remove the rear panel (the one with the USB ports and switched) the front panel can stay.

Then you can remove the PCB assembly.
20130422_221050_zps53edf724.jpg

Take that apart, note the 2 ribbon cables, 1 is for the USB and the other is for the switches, go ahead and cut both ribbon cables. If you are a real Pro, desolder them.

Then Cut your PCB up like this. Throw out the larger section as we no longer need it. Keep the USB daughter board.
20130430_135956_zps194cf730.jpg

ruwe0x_zpsbeb25ba8.jpg
Where to solder for the ground, start, home and select.

This next part I forgot to take photos of so bear with me.
Note the daughter board with the switches and USB port. The spot the USB ribbon cable was is labeled. You can attach a USB cable (or just 4 wires) so you can run them to your new PCB.
Reference for USB hacking http://pinouts.ru/Slots/USB_pinout.shtml
The only other useful point right now is the GND point where the other cable was.

Using some 30 awg wire I tapped the 4 signal trances for Start, Select, Home and Ground. That wire for ground was soldered to one of the 2 far poles (left or Right) for the tournament lock switch as the middle lead to that GND point.
This way I can still use the Tournament Lock. The remaining 30 awg wires where splice to thicker 24 awg wire which is leading to my PS360+ PCB.

20130508_152048_zpsc7e39928.jpg
Once I drilled a 24mm hole and did some dremling so I can fit a Neutrik RJ45 Passthrough, and reassembled the remaining PCBs
So now the back of my rear panel looks like this.

Attaching the rear panel back to the rest of the stick (and cutting a hole for the Neutrik to fit), then super gluing some standoffs into place my stick looks something like this.
20130508_190702_zps0591c8eb.jpg

20130508_154256_zpsb385fee2.jpg
See how I routed the wires through the side openings? Normally bits of plastic on the side panels will prevent this.
20130508_154243_zpsef8e1b19.jpg
A Dremel, hot knife, pliers or other means of cutting will make short work.

Now the final part, after replacing the sides, its time to close the lid. But wait there is a PS360+ and a LS-32 in the way.

20130508_191956_zpsbef9f6b7.jpg
So trim all that annoying plastic . Do not get rid of it, just cut it down to a half inch to a inch.
20130508_192028_zps078d3057.jpg

20130508_223728_zps41167e4f.jpg
And here is the Final Product. Template courtesy of d3v.

VLX Kuro mounting holes?

0
0
Hey guys
Trying to install an LS32 into my stick, but I have no way to mount it. I'm using the S plate, but the corner screw holes don't line up. From what I remember that was pretty normal and you'd use the middle screw holes, however the screw holes on my stick don't have a thread cut in them. Is this normal? If other people have the same then I'll deal with it somehow but if it's just mine that slipped through I'll return it.
https://puu.sh/qO4ss/b5f120aa07.jpg
It's the centre holes I need to use but they are just holes without a thread cut into them, so the screw won't go in.

Who can build a fightstick from scratch?

0
0
Sorry if this is not the place to ask. I need a special made fightstick. Because I am Handicap.
Do you know any company that builds them? Ii can share a picture of the plans if anyone wants to see.
Thanks

Blast City vs Net City

0
0
I have the opportunity and cash on hand to buy my first cab. The seller has a couple of Net Citys and Blast Citys. Each of them is going for $750. They both have the stock Nanao MS-2931 monitors. It will mostly be used for fighting games but I also want to play House of the Dead on it. It will just be used for Dreamcast until I get some systems and PCBS.

The NC is JVS but I've read that going from JVS to JAMMA is easier than the other way around. It will be easier for me to set up when I get more games in the future. On the other hand BCs are more in demand.

Which one would you choose in my situation?

aged Purple heart Wood

0
0
Having a purple heart stick my self for about three months now, I've learned that the exotic wood looses it's luster over the course of years depending on UV exposure and so fourth. after peeking at some awesome stick in the Check out my arcade stick thread i wanted to ask anyone who has had a purple heart stik for 4-5= years to let me know if you noticed a huge difference in the color change or can post a pic so i can see what it looks like. Ive googled faded purple heart wood and i haven't seen any good pics really seen anything good

Question regarding connectivity of Hori RAP V Kai (XBOne ver)

0
0
Alrighty thats prolly n00b as all heck to ask, but I can't really afford to take any chances so I rather make sure.

Let me preface this with my current situation: I plan on going to EGX next month to join the Tekken 7: FR Tournament. As I havent figured out if it's gonna be full cabinets or the stripped down version (as seen at the last 2 evos and wizard world tour) I'll kinda have to buy a new stick as my current one is about to fall apart on account of being babbies first garbage stick (the wireless T6 one).

Any way I look at this thing, the Hori Real Arcade Pro V Kai Xbox Edition seems to be the right thing for me. (not really looking for stick suggestions). However I haven't figured out if the stick connects to the Tekken 7 Arcades as is or if it needs to be modified. Thing is I got like 2 weeks delivery on the damn thing, I live in germany while EGX is in Birmingham meaning I can't really order a stick and then find out it needs to be modified and still get it done in time for my departure so its basically a matter of whether I have to buy it modified from the get go or if the vanilla version works as is.

edit:
This thing's connectivity is otherwise perfect for my home uses as is, cuz I got a 360 and a windows 10 comp (xbox devices on windows 10 are fun!) With all the PS4s around I would have to mod it sooner rather than later anyway, but as I said going in: time is kinda of the essence
Viewing all 2075 articles
Browse latest View live


Latest Images